Make the setup small enough to forget
Live looping means recording a phrase and repeating it while you play or record something else. A hardware looper or a software looper can do that. For a first session, you need one sound source, one recording path, and a way to hear the result clearly.
With a computer, that usually means an instrument or microphone, an appropriate audio input, looping software, and headphones. A MIDI footswitch can make the recording controls easier to reach while playing, but it does not carry your guitar or microphone audio. Treat audio and control as two separate connections.
Before recording, play the loudest part you expect to use. Leave room on the input meter rather than aiming for its top. Then stop playing and listen. If the input is noisy or you hear the same note twice, solve that now. Every new layer makes an untidy starting point harder to hear around.
Start with two bars and an obvious downbeat
Choose a phrase you can play comfortably several times in a row. Two bars of a simple rhythm is enough. A busy part can sound exciting by itself and leave nowhere for the next part to sit.
For a concrete exercise, use 4/4 at 90 quarter-note beats per minute. Count two bars out loud: “one, two, three, four; one, two, three, four.” Those eight beats take about 5.33 seconds. Our loop length calculator lets you check other tempos and phrase lengths.
Rehearse the phrase before pressing record. Keep playing through its end and back into its beginning. That transition is the part you are practising. If you only rehearse the notes inside the phrase, you leave the hardest moment to chance.
Finish where the next “one” belongs
Begin recording on the first beat of the phrase. Close the recording at the point where the next repetition should begin. In the two-bar exercise, that is the next “one” after your second count of four, not the “four” itself.
Listen to the loop alone for at least three repetitions. A short gap at the boundary can feel like a hesitation. An extra fragment at the end can sound like the rhythm trips over itself. Re-record the base if the join feels wrong. Overdubbing more notes is rarely a good way to hide a timing problem.
Some loopers offer quantized boundaries. Others follow the exact moment you press the control. Learn which behavior is active before deciding whether the timing error came from your hands or your settings.
Make the second part answer the first
Once the base feels steady, add one contrasting part. If the first loop is dense and percussive, try a long note or a sparse melody. If it is sustained chords, try a short rhythmic response. The useful question is not “what else can I fit in?” but “what is missing?”
Stop recording the overdub and listen again. You should be able to describe what the second part contributes. If both parts compete in the same register or play through every gap, remove the new take and try less.
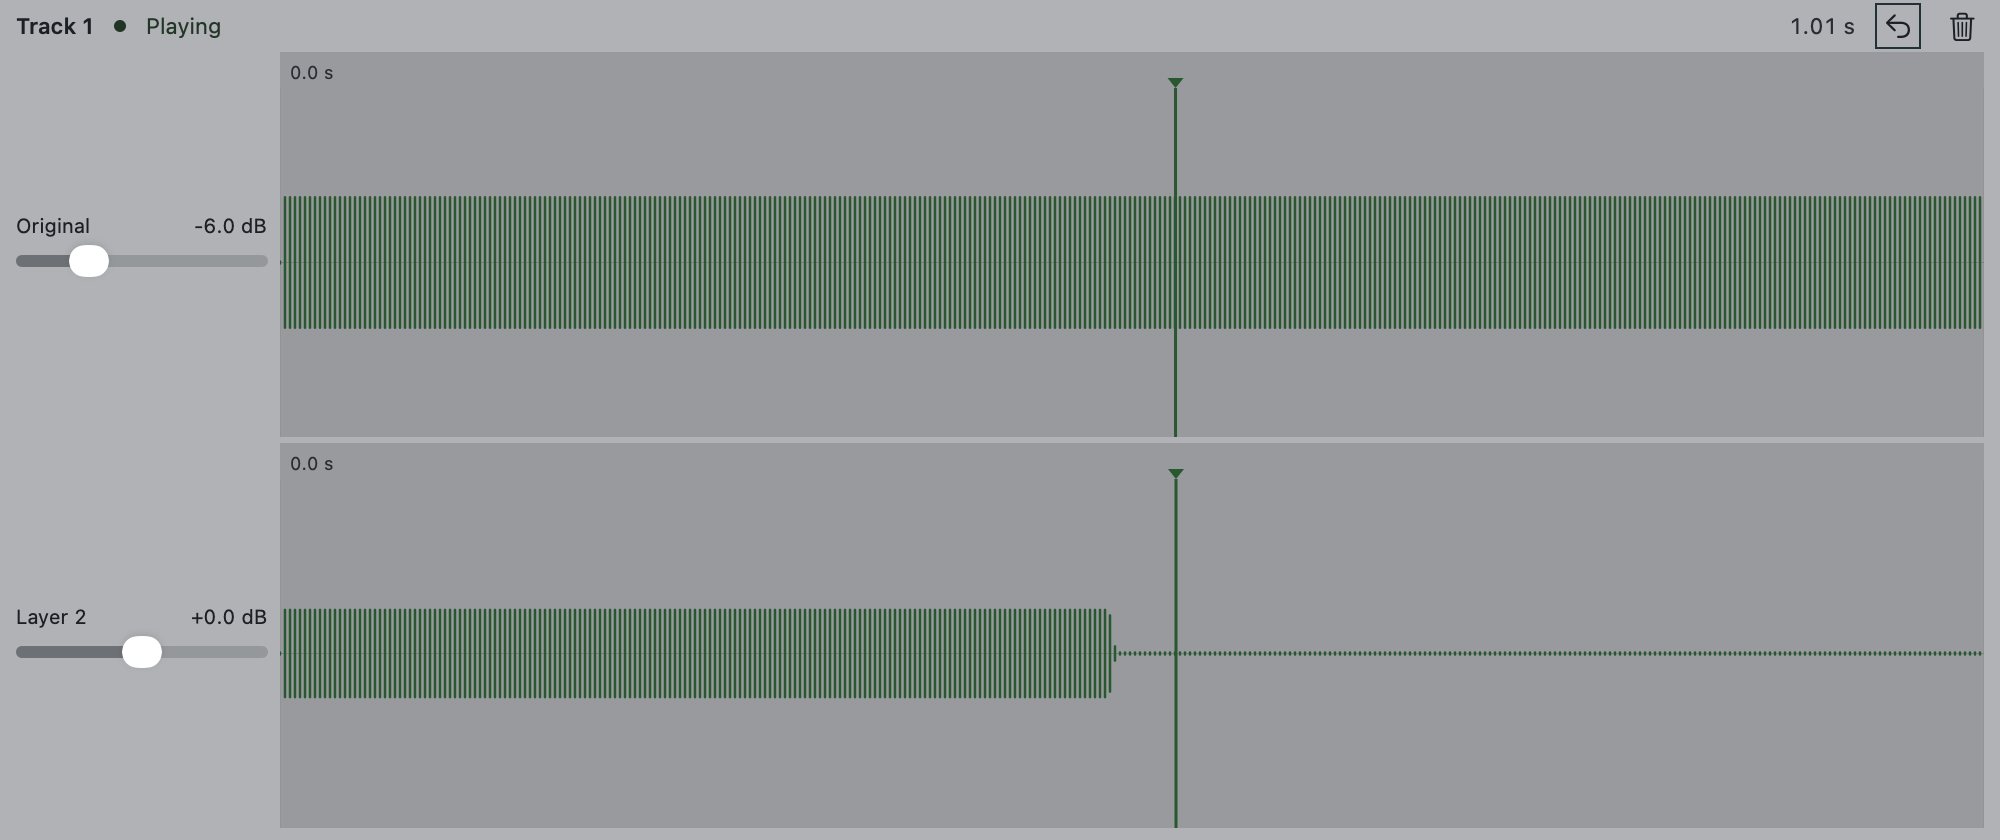
In Coherent’s development build, layers have individual volume controls and Peel removes the latest overdub while preserving the base loop. It is one level of overdub recovery per track, not an unlimited editing history. The screenshot above shows the real loop-detail interface.
A ten-minute session that actually teaches you something
- Two minutes: choose and rehearse one short phrase, including the wrap back to its start.
- Three minutes: record the base, listen without playing, and redo it until the join feels settled.
- Three minutes: add one part with a different role. Remove it if the base becomes harder to hear.
- Two minutes: improvise over the loop without recording. Let some good ideas disappear.
Finish with a loop you enjoy hearing, even if it has only two parts. More layers are an option. Wanting to keep playing is the result.
Where Coherent fits
Coherent is a live looping DAW in development. Its native macOS interface brings track recording, overdubs, layer levels, effects, and optional MIDI footswitch control into the same session. Public downloads are not available yet.
You can use the exercise above with another looper today. If this is how you like to make music, . For instrument-specific starting points, see the guitar setup and vocal setup.